How to Make a Copper-Gilded Wooden Necklace
This tutorial will show you the basics of how to make an attractive, modern, wooden necklace decorated with a layer of pure copper. It's not too hard, but as always don't rush, be careful, check your details and always always always measure twice, cut once.
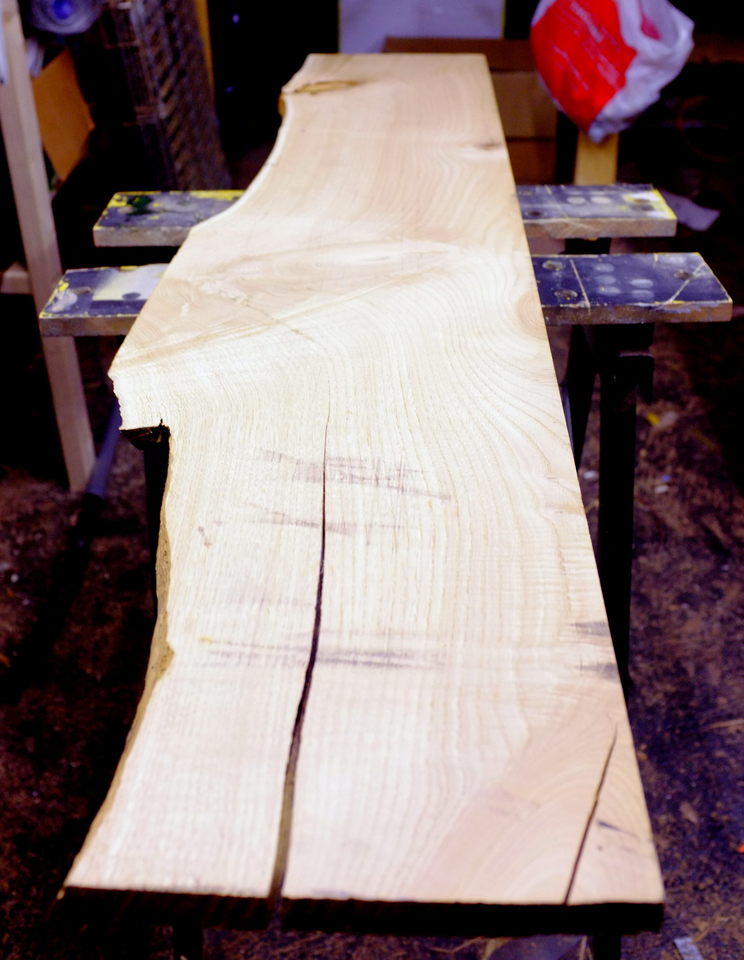
Some wood! Hardwoods are often more exciting than softwoods, check out your local timber yard or online to see what you can find. Because you don't need much, offcuts are good - and can be picked up very cheaply.
Tools. I use quite a few here, because I have them - but all you really need is a drill and a saw. You'll need a small drill bit so you can hang your pendant (I use 3mm) and a bigger one to make the hole for gilding. A range of sandpapers is needed as well, you'll want to go quite fine to get the finish nice and smooth.
Gilding size and your choice of metal to gild. I use copper because I like the colour but you can use gold, silver, platinum, brass - whatever you want. Many suppliers offer starter kits which contain everything you need to get going.
Some sort of chain to hang the pendant on, and a varnish or lacquer to finish it with.


Close the doors and windows. You don't want any breezes during this process. If you're a bit dusty, wear clean cotton gloves. Feel free to have a little rave at this point as well.

Applying the gild to the size is fairly easy. Just lay it on, carefully and smoothly, making sure you cover the area you want gilded. On a flat surface, brushing it on with a soft brush is a good technique, but I've found with these inside-hole gilds I get better results using my little finger.

Once the gild is on, it'll look a bit untidy round the edges. Use a brush or a sponge to gently remove the excess. A tiny bit of sanding to tidy up any unruly gild which might have spilled over the edge onto the face could be needed.
 You're almost done! Finishing touches now. First it's into the spray box to get a coat or two of lacquer.
You might prefer to paint a varnish on or some other finish. While the natural wood will be OK unfinished (although it won't look as good), the gild will need some sort of protection otherwise it will rub off with time.
A few coats later, a bit of time to dry, some extra trim and a nice chain - behold! A finished necklace. Look at how wonderfully the grain of the wood comes out with the lacquer.
This piece and many more like it are available to buy now on my Etsy store.

So that's my first tutorial. I hope it was useful to someone.
Coming next, how to do epoxy inlays, so you do effects like this one, and more.
Things you will need
Tools. I use quite a few here, because I have them - but all you really need is a drill and a saw. You'll need a small drill bit so you can hang your pendant (I use 3mm) and a bigger one to make the hole for gilding. A range of sandpapers is needed as well, you'll want to go quite fine to get the finish nice and smooth.
Gilding size and your choice of metal to gild. I use copper because I like the colour but you can use gold, silver, platinum, brass - whatever you want. Many suppliers offer starter kits which contain everything you need to get going.
Some sort of chain to hang the pendant on, and a varnish or lacquer to finish it with.
Handmade Gilded Necklace Tutorial

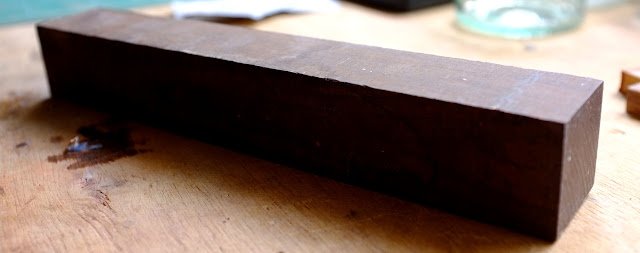
First, get some wood. I'm using sustainably sourced African Blackwood here because I love how well it contrasts with the colour of the copper. Measure and cut a piece of the size you want your pendant to be - cut slightly large because we're going to do some sanding.
Now would be a great point to imagine some kind of speeded up montage of workshop sounds as the wood is cut and then roughly sanded to get rid of the saw marks.


OK, cool. That's a Japanese pullsaw in the second photo there, they're great for this kind of small work, and make very smooth cuts. I got mine from Woodwork Projects UK who also supplied the excellent little guide to make sure I cut nice and square.
Onto the power sander to get the rough edges off, and then it's on to the drilling.


The first hole to drill is a narrow one through the piece vertically, this will be where you thread your chain or thong.
Make this one really carefully.
Then a nice big hole in the face of the piece, which will be where the copper will go.
Make this one really carefully.
Then a nice big hole in the face of the piece, which will be where the copper will go.

Once you've got your holes drilled, give it a good sanding with a fine paper - this is 320 grit - until you're happy with the finish. It should be at a stage where it's ready to be lacquered, with all the dust removed - unlike in the photo above!

Now, it's time to gild. The glue used for gilding is called "size" and you want to carefully apply it wherever you want the metal to end up. Make sure you get a nice, even coat of size on. Blackwood is happy to be gilded direct onto its surface, but other woods might need sealing with sanding sealer or a thin coat of lacquer. Let any seal dry all the way, and rough it up a bit with sandpaper to make sure the size can adhere.
It's very important to let gilding size dry a bit to "tack" so this is a perfect time to get on with one other vital task in this process.

A nice cup of tea. Don't, whatever you do, rush this. Maybe grab a biscuit too.
After a while - how long depends on temperature and what sort of size you're using, the one I'm using takes about 15 minutes - the size is ready to take the gild.
Close the doors and windows. You don't want any breezes during this process. If you're a bit dusty, wear clean cotton gloves. Feel free to have a little rave at this point as well.


Once the gild is on, it'll look a bit untidy round the edges. Use a brush or a sponge to gently remove the excess. A tiny bit of sanding to tidy up any unruly gild which might have spilled over the edge onto the face could be needed.

You might prefer to paint a varnish on or some other finish. While the natural wood will be OK unfinished (although it won't look as good), the gild will need some sort of protection otherwise it will rub off with time.
A few coats later, a bit of time to dry, some extra trim and a nice chain - behold! A finished necklace. Look at how wonderfully the grain of the wood comes out with the lacquer.
This piece and many more like it are available to buy now on my Etsy store.

So that's my first tutorial. I hope it was useful to someone.
Coming next, how to do epoxy inlays, so you do effects like this one, and more.


Great tutorial and awesome work. I was wondering about the hole that the necklace goes through, is that a tube or metal end cap? Thanks
ReplyDeleteThose are sterling silver bead grommets. They're not expensive, they just glue in, but they really improve the look of the thing.
ReplyDeleteI buy mine from here: http://www.palmermetals.co.uk/shop/sterling-silver-findings/sterling-silver-bead-grommets-1.html
Which is probably only useful to you if you're in the UK..
Any chance you could provide the info on your drill vice? I have a standard drill but can't seem to find a good vice to fit it.
ReplyDeleteI couldn't find a good vice for my hand-held drill either, which is why I eventually just got a full-on bench drill. The one in my photo is this one: http://www.machinemart.co.uk/shop/product/details/cdp5r-drill-press
DeleteIt was a bit more expensive, but it was totally worth it!