Posts

Showing posts from 2014

Pre-Christmas Sale

Image
Try not to think about how close Christmas is, except to think far enough to buy some presents now while they're cheap. Every pound* spent this month is a pound you'll have spare in December for beer** or hot spicy wine. Maths! http://shinium.etsy.com * dollar, crown, shiny bead, etc ** egg nog, chocolate snowman, mince pie, etc

Resin-inlaid Wood

Image
A non-jewellery post, for a change. We were running a bit short on shelving in the kitchen and wanted somewhere we could store all the preserves we're going to make from the garden this year, so we went to the timber yard to see what they had. They had this, 155cm long piece of chestnut. It was pretty heavily cracked and pitted, with knotholes and so on. But, I had a plan. Resin inlay. A technique traditionally used with a colour-matched epoxy to the wood, to give an "invisible" repair. I'm taking a slightly different approach. First job, seal off the holes from the bottom, using aluminium plumber's tape. It's super sticky so it seals well, and it won't be damaged by the resin either. You might need these seals to hold for a few days, depending on the weather. Make sure the wood is level, otherwise you'll end up with wonky resin bits. Now it's time to mix the resin. Give it a good mixing and then add your pigment. If you warm i

Soldering a Simple Silver Ring

Image
I was asked about doing a tutorial on soldering. So here it is. Soldering is much easier than it looks - with a bit of practice you can be making bezels, joining bits of wire and much more. Main things to remember are clean joins and to heat the piece not the solder. Spending time getting everything nice and clean and properly in place before you get the blowtorch out is important. Notice how much time, even speeded up, I spend aligning the piece of silver in this video. I've heard the word "light-tight" used to check a joint is ready for soldering - if you can see air between the two bits of metal, your joint isn't lined up correctly. Some people say solder won't fill gaps, but it will. That's not an excuse to not having your joints line up though! This ring was only polished to about 800 grit (the  radial polishing discs  you see towards the end are awesome!) so it's still a little satin-y to look at. There's nothing to stop you polishing it al

Finishing Rings with CA (Superglue)

Image
Wooden rings benefit from a good tough, protective coating both for visual appeal and to keep them safe from scratches and knocks. CA (superglue) is perfect for this. It dries very hard, very tough and super glossy. The process for finishing a ring is pretty easy. It's as simple as building a few layers on the ring, sanding flat and then polishing to a shine. The ring featured below only took ten minutes from start to finish, which is helped by using an accelerator spray on the CA, but even without that you can do the whole job in well under an hour. Before starting, the ring has been sanded to 1500 grit, dusted and cleaned with white spirit, then mounted on my turning jig (OK, OK, it's a power drill clamped to my bench - but it works!). This process can be used for metal rings too - a coat of CA will protect a gilded finish, or stop copper from tarnishing. For a change, I've made a video of the process rather than photos. Here we go, apologies in advance for dodgy ed

EverBrite ProtectaClear Metal Finishing Coat - Test and Review

Image
I recently acquired a small bottle of EverBrite's ProtectaClear coating, a skin-safe, one part coating for metal jewellery. Supposed to be tough, hardwearing and so on, to keep metals safe from tarnish and oxidation and other damage. It's simple enough to use - a light, clear liquid which brushes on easily and dries fast - but does it work? Time to run some tests. I prepared a few bits of copper, as that tarnishes quickly and I have scraps kicking around my workshop. Also a chance to try out my new letter punches. Nice and clean, not 100% polished by hey - just a test, right? Fully degreased and prepped for coating. Coated and dry and ready to go. The zero band has no coating, the one a single coat, the two a double coat. Time to put these things through some punishment.   OK, top to bottom: A - On my keyring. Two days of being bashed around in my pocket with assorted bits of metal in close contact. B - Tied to my shoe. An afternoon

A Short Gilding Tutorial

Image
As requested by someone on Reddit's wonderful /r/crafts subreddit, a short tutorial on gilding. Gilding is not as hard as you might expect, and with a simple beginner's kit , you can get going right away. I suggest purchasing an imitation leaf kit to start with, as messing up gilding aluminium is an awful lot cheaper than messing up with 24k gold leaf! OK, so here are a pair of rings waiting to be gilded. They were made as per the tutorial on making metal rings I did last week. One silver, one copper. One bright and mirror polished, one satin finish. They need to be clean, so no finishing polish or wax just yet. I'm going to use two different gilds on these, in two different styles - but your options are limited only by your skills with a brush and your imagination. Gilding, being an ancient art, has lots of lovely old language associated with it. Gilders don't use glue, they use size. It's basically just glue. I like to use a nice fine lining

How To Make A Simple Metal Ring

Image
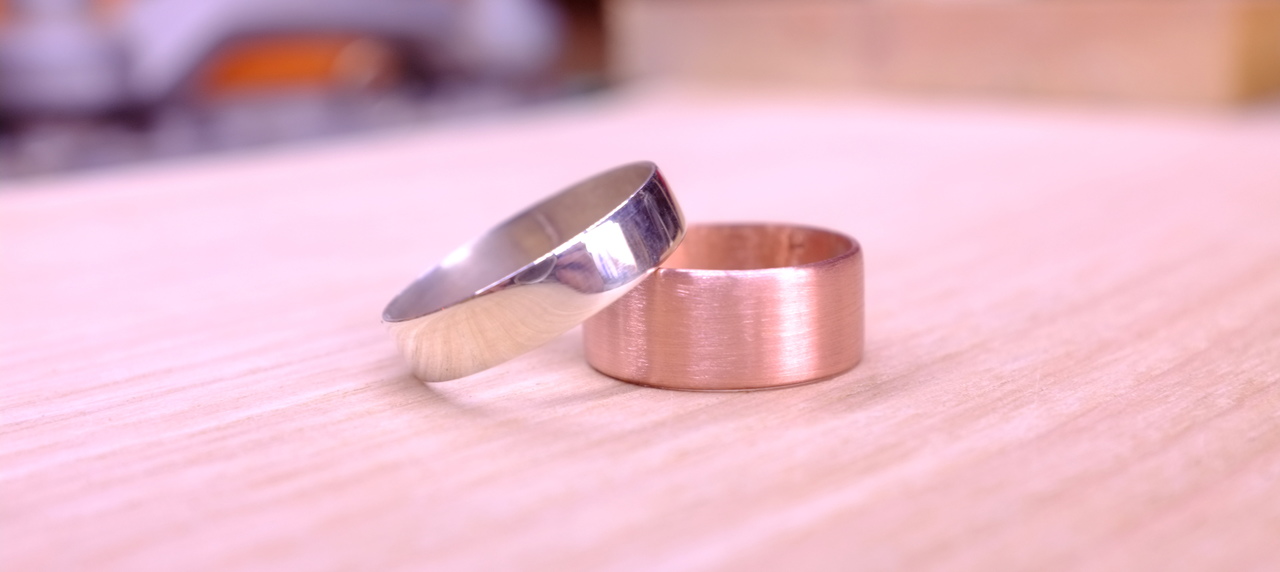
Shiny! This simple ring is a great way to start to learn how to work with metal. I've tried not to use too many specialist tools, so this should be - hopefully - helpful for beginners. Things you will need: metal, silver solder, blowtorch, hacksaw, emery cloth (or wet-and-dry paper), hammer. Things you don't need but will make life easier: file, solder flux, nylon/rawhide mallet, power drill/lathe, ring mandrel, ball pein hammer. First up, metal. Almost anything you can buy in sheet form is OK, I'm using copper because it's cheap and fairly easy to work with. Brass would be another good option, maybe even silver if you're feeling wealthy. I buy my metals from  Cookson Gold  in the UK, other suppliers are available. Note: aluminium is not suitable, it melts at a lower temperature than the solder does. Using some Maths ( 2 x pi x (r + metal thickness) ), or  this useful calculator , work out how big you need your blank to be, and mark and cut. I'm