A Short Gilding Tutorial
As requested by someone on Reddit's wonderful /r/crafts subreddit, a short tutorial on gilding.
Gilding is not as hard as you might expect, and with a simple beginner's kit, you can get going right away. I suggest purchasing an imitation leaf kit to start with, as messing up gilding aluminium is an awful lot cheaper than messing up with 24k gold leaf!
OK, so here are a pair of rings waiting to be gilded. They were made as per the tutorial on making metal rings I did last week. One silver, one copper. One bright and mirror polished, one satin finish.
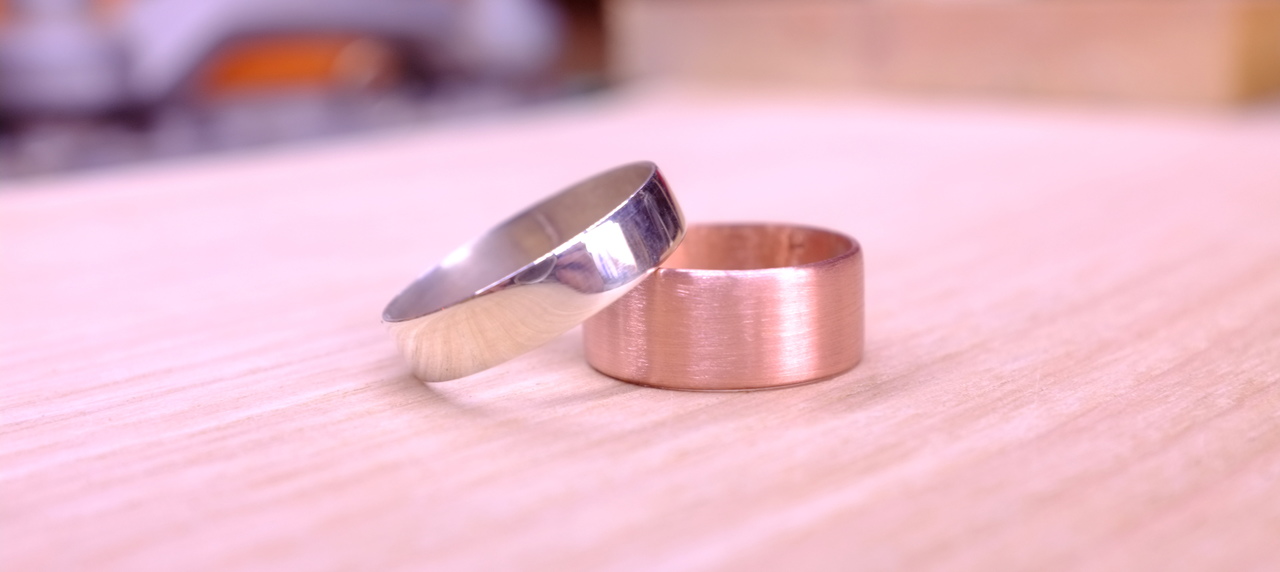
They need to be clean, so no finishing polish or wax just yet. I'm going to use two different gilds on these, in two different styles - but your options are limited only by your skills with a brush and your imagination.

Gilding, being an ancient art, has lots of lovely old language associated with it. Gilders don't use glue, they use size. It's basically just glue. I like to use a nice fine lining brush, you go with whatever you have or whatever you're comfortable with.

Put the ring somewhere secure and apply your size. Here I have the ring on a turning jig and it's spinning slowly so I can get a nice neat line of size.

This one I painted by hand, you can just see the size if you look closely. You need to let the size dry to 'tack' stage, where it's no longer wet but it's still sticky. This modern, acrylic, size dries in about ten minutes and remains tacky for an hour or so. Your size will have its times on the packaging. Have a cup of tea while it dries.

Time to sort out the gild. Here is loose-leaf copper on the right, and transfer electrum (aka green gold, a silver/gold alloy) on the right. Loose leaf is exactly what it sounds like, just leaf ready to be applied. Transfer leaf is lightly bonded to paper, so you can pick up and move it around more easily. It's a bit less flexible when doing odd shapes, but it's much easier to handle.
Make sure you're in a draught-free environment when dealing with loose-leaf, it's incredible easy to blow it away or get it stuck to things it's not supposed to be on. Even exhaling too hard near it can cause problems.

Here we go! Pick up the leaf with a soft brush (or, in gilder-speak, a "mop"), this one is squirrel hair and came in the kit I bought. You can use your fingers too, if you're careful. Copper leaf, being a bit thicker, is rather easier to handle than silver or gold. Apply it gently to the ring.

Make sure you get leaf everywhere you have size applied. When in doubt, use too much rather than too little. I like to leave it for a minute or so to apply, but you don't really need to.

With the green gold, I simply cut the transfer sheet roughly to size and gently apply to the ring, again making sure to cover everywhere there's size. Peel the paper carefully off and brush softly to remove the excess gild.

Brushing off the excess copper. A gentle touch is a good idea here, although you can get some good effects using a scouring pad, stiff brush or even sandpaper at this stage. Have a play about, see what works.
Buff gently with a soft cloth and then there's only one stage left - a protective coat. The gild is very prone to being rubbed off without protection, so you need something here. Because it's a finish I use a lot on my wooden rings, I'm going with superglue.
 Using a soft cloth, wipe on a few coats of superglue, let it set, and polish it with a plastics polish or paint finishing polish. This will leave it both strong, and shiny. The exact details of this technique are a subject for a tutorial of their own, which I'll do soon!
With a copper ring, putting a coat of glue on the inside will help stop the 'green finger' problem that copper jewellery often suffers from.
Here are the finished pieces, along with a few others. This technique works perfectly well on wood too.


Gilded rings, along with other rings and pendants and so on, are all available on my Etsy shop.
Gilding is not as hard as you might expect, and with a simple beginner's kit, you can get going right away. I suggest purchasing an imitation leaf kit to start with, as messing up gilding aluminium is an awful lot cheaper than messing up with 24k gold leaf!
OK, so here are a pair of rings waiting to be gilded. They were made as per the tutorial on making metal rings I did last week. One silver, one copper. One bright and mirror polished, one satin finish.
They need to be clean, so no finishing polish or wax just yet. I'm going to use two different gilds on these, in two different styles - but your options are limited only by your skills with a brush and your imagination.
Gilding, being an ancient art, has lots of lovely old language associated with it. Gilders don't use glue, they use size. It's basically just glue. I like to use a nice fine lining brush, you go with whatever you have or whatever you're comfortable with.
Put the ring somewhere secure and apply your size. Here I have the ring on a turning jig and it's spinning slowly so I can get a nice neat line of size.
This one I painted by hand, you can just see the size if you look closely. You need to let the size dry to 'tack' stage, where it's no longer wet but it's still sticky. This modern, acrylic, size dries in about ten minutes and remains tacky for an hour or so. Your size will have its times on the packaging. Have a cup of tea while it dries.
Time to sort out the gild. Here is loose-leaf copper on the right, and transfer electrum (aka green gold, a silver/gold alloy) on the right. Loose leaf is exactly what it sounds like, just leaf ready to be applied. Transfer leaf is lightly bonded to paper, so you can pick up and move it around more easily. It's a bit less flexible when doing odd shapes, but it's much easier to handle.
Make sure you're in a draught-free environment when dealing with loose-leaf, it's incredible easy to blow it away or get it stuck to things it's not supposed to be on. Even exhaling too hard near it can cause problems.
Here we go! Pick up the leaf with a soft brush (or, in gilder-speak, a "mop"), this one is squirrel hair and came in the kit I bought. You can use your fingers too, if you're careful. Copper leaf, being a bit thicker, is rather easier to handle than silver or gold. Apply it gently to the ring.
Make sure you get leaf everywhere you have size applied. When in doubt, use too much rather than too little. I like to leave it for a minute or so to apply, but you don't really need to.
With the green gold, I simply cut the transfer sheet roughly to size and gently apply to the ring, again making sure to cover everywhere there's size. Peel the paper carefully off and brush softly to remove the excess gild.
Brushing off the excess copper. A gentle touch is a good idea here, although you can get some good effects using a scouring pad, stiff brush or even sandpaper at this stage. Have a play about, see what works.
Buff gently with a soft cloth and then there's only one stage left - a protective coat. The gild is very prone to being rubbed off without protection, so you need something here. Because it's a finish I use a lot on my wooden rings, I'm going with superglue.
With a copper ring, putting a coat of glue on the inside will help stop the 'green finger' problem that copper jewellery often suffers from.
Here are the finished pieces, along with a few others. This technique works perfectly well on wood too.
Gilded rings, along with other rings and pendants and so on, are all available on my Etsy shop.


Comments
Post a Comment